
Documentation
Server Installation Tutorial with VirtualBox (New)
1: Pre-Installation
Installing to a VirtualBox VM (Virtual Machine) is one of the fastest and easiest ways to get up and running with TurnKey Linux. The open source edition of VirtualBox can be downloaded for free from the VirtualBox website.
As the following step by step tutorial shows, once you are familiar with the basics, deploying a server takes just a few minutes. The installation process is the same for all servers.
VirtualBox vs VMWare (and others)
VirtualBox is the most popular open source alternative to VMWare's proprietary virtualization products. VMWare is not open source but some of its products are also available for free download (e.g., VMWare Player and VMWare Server).
TurnKey Linux is designed to work well with both VMWare and VirtualBox (and other platforms). This tutorial focuses on VirtualBox, but the principles are the same regardless of what virtualization software you use.
Begin by downloading and installing VirtualBox, a free software virtualization program available for Windows, Mac OS X and Linux. It's preferable to use a recent version (5.X and up).
If you intend to run a 64bit build, you will also need to ensure that hardware virtualization is enabled in your system BIOS/UEFI before proceeding. Virtualbox cannot create 64bit virtual machines without these virtualization capabilities. Depending on your system, hardware virtualization may be either enabled or disabled by default.
- Intel users: enable Intel Virtualization technology (VT-x) in your BIOS/UEFI.
- AMD users: enable AMD Virtualization (AMD-V) in your BIOS/UEFI.
2: Download the ISO
Download the ISO image from the page of the app you want to run. The generic ISO image is a Live CD image that can be installed anywhere, including bare metal and most types of virtual machine.
3: Installing from the ISO image
Create a new Virtual Machine
Start VirtualBox and click the New button from the menu. This starts the VM (Virtual Machine) creation wizard. In the wizard:
- Give the new VM a name. Select Linux in the Type dropdown menu and Ubuntu from the Version menu.
- Allocate at least 256mb of Ram in the following menu.
- Select create a virtual hard disk now and press create. Select VDI (Virtualbox Disk Image) as the disk file type.
-
Choose how you want the VM to use your physical hard disk:
- Selecting dynamic allocation will allow the virtual machine to automatically allocate space on your virtual hard disk until it reaches the maximum capacity that is assigned to it. By default, this maximum capacity is 8 GB. To alter this value, press next and adjust the slider. Press Create to close the wizard and generate the VM.
- Selecting fixed size will prevent the virtual machine from automatically allocating further space. Note that choosing this may increase the time needed to create the VM. Once you have assigned a size to your virtual disk, press Create to close the wizard and generate the VM.
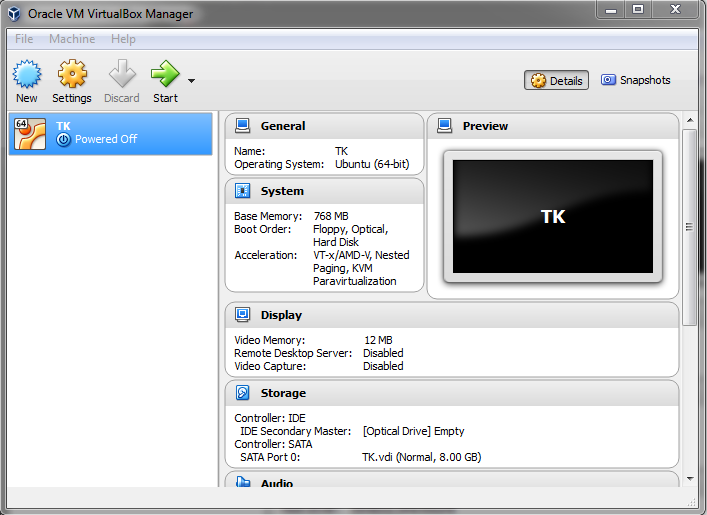
After exiting from the VM creation wizard, you'll see your new VM in the machine list on the main screen as shown below.
Configuring the Virtual Machine
Next you'll need to tweak a few configuration settings for the new VM (e.g., Network, CD image, Boot order). With your new VM selected, click the Settings button to start.
Configure boot order
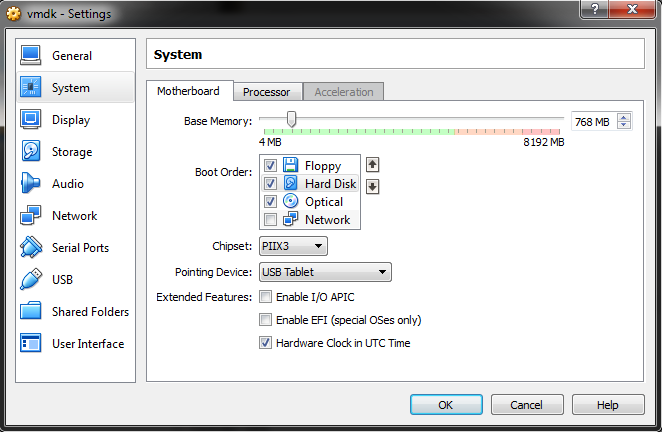
In the System section, click on the Motherboard tab and change the boot order so that Hard Disk is above Optical as shown below. This will cause the virtual machine to boot straight from the virtual hard disk once the installation is complete.
Note for users with AMD CPUs: if you have an AMD Phenom or Barcelona-level Opteron CPU, you may need to enable IO APIC here to work around a Linux kernel bug.
Configure network
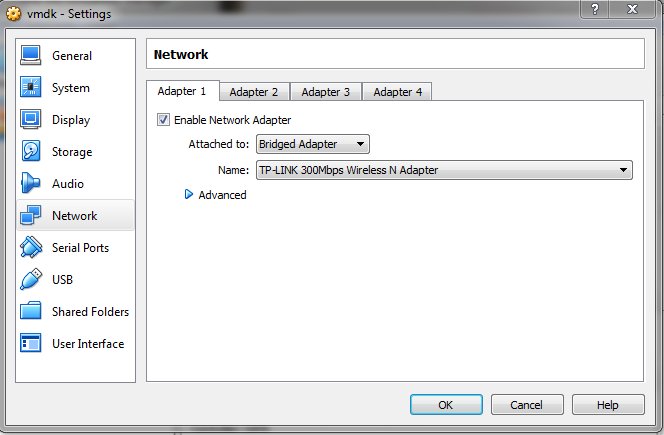
Under the first adapter tab in the Network section, attach your VM to a Bridged Adapter as shown below. This bridges your VM to the local network your host machine is connected to. If you have multiple network interface cards on the host, select which of them you want your VM to attach to. If unsure, experiment. You can always change this later.
Installation
-
Back in the VirtualBox main menu, select your Virtual Machine and click on the Start button. You will then be prompted to select a start-up disk. Direct the file browser to your ISO image and press Start. Once the VM starts, you will see the boot loader menu. Select the Install to hard disk option with the keyboard and press Enter.
 This boots straight into the server's installer. Select the default "Guided" partitioning method, which figures out how to partition the virtual hard disk automatically. If unsure, just confirm the defaults.
-
Confirm the re-partitioning of the virtual hard disk.
-
When prompted, install the GRUB boot loader to the master boot record.
The installer will now quickly install the server to the virtual hard disk. Usually this takes about a minute. When installation is complete, restart the server. The system will then reboot from the virtual Hard Disk.
The first time the system boots, you'll be taken to various configuration screens that will vary depending on the server that has been installed:
- You will be asked to set passwords for all relevant accounts.
- If you have an API key for TurnKey Hub Services, you may enter it when prompted. Note that this may be done at a later time through the command line.
- You will also be prompted with options to enable local system notifications regarding critical security threats and to install security updates (requires an internet connection).
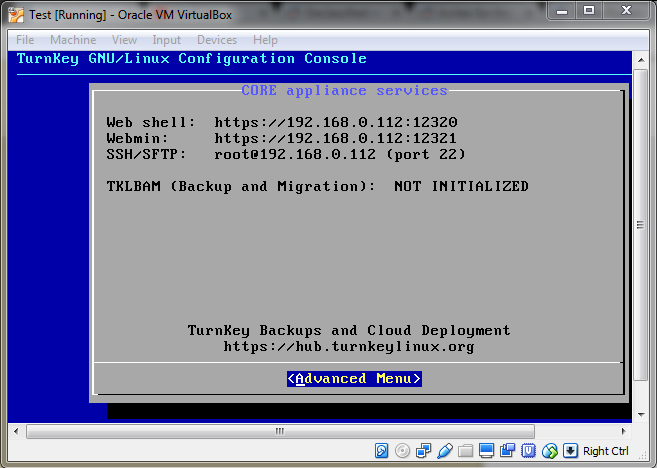
After that the first boot will be complete and you'll reach the Configuration Console's Usage screen. You can now log into your newly installed TurnKey server through your web browser by entering one of the IP addresses listed at this screen.
Enjoy!