You are here
Appliance installation tutorial with VirtualBox
Note: this tutorial is quite dated. There is an updated version here. In essence it should still be generally relevant, however some of the VBox options may have changed and some of the TKL options and screenshots may not be quite the same as noted here. If you have any issues, please post in the Support section of the forums.
Getting Started
Installing to a VirtualBox VM (Virtual Machine) is one of the fastest and easiest ways to get up and running with TurnKey Linux. The open source edition of VirtualBox can be downloaded for free from the VirtualBox website.
As the following step by step tutorial shows, once you are familiar with the basics, deploying an appliance takes just a few minutes. The installation process is the same for all appliances. We'll be installing TurnKey Joomla as an example.
VirtualBox vs VMWare (and others)
VirtualBox is the most popular open source alternative to VMWare's proprietary virtualization products. VMWare is not open source but some of its products are also available for free download (e.g., VMWare Player and VMWare Server).
TurnKey Linux is designed to work well with both VMWare and VirtualBox (and other platforms). This tutorial focuses on VirtualBox, but the principles are the same regardless of what virtualization software you use.
Installation and basic usage video
Note: The following video shows installation of an older version of TurnKey Linux. The basics are the same but a few things have changed. For example, TurnKey is now available in a ready-to-run VM optimized build (in addition to the ISO). Also in TurnKey Linux v11+ passwords are set on first boot and not during installation.
First, install VirtualBox
If you haven't done so already, download and install VirtualBox, a free software virtualization program available for Windows, Mac OS X and Linux. It's preferable to use a recent version (2.X and up).
Second, choose a build type and download the image
Appliances are available in multiple build types which work well with VirtualBox:
-
VM optimized images
- Default build: it's a ZIP file containing a ready-to-run VMDK hard disk image which includes a virtualization optimized kernel and VMWare tools.
- OVF build: it's a ZIP file containing the default VM build converted to OVF format, which is easier to work with sometimes (e.g., high-end VMWare products).
- Generic ISO image: Live CD image that can be installed anywhere, including bare metal and most types of virtual machine.
Confused which to choose? Just download default VM build and use that. It's the first download link on the appliance page.
After the download, follow the instructions in the appropriate third step below.
Third, deploy a VM optimized image (#1 alternative)
Create new VM
Exactly how you setup a VM image depends on whether you've downloaded the default VM build or the OVF version. Both work equally well with VirtualBox.
Using the default VM optimized build...
- Unzip the default VM build
-
In VirtualBox, launch the VM creation wizard by clicking the New button:
- OS Type: Select Linux / Ubuntu (Note: select 64bit if you are using the amd64 build) as your operating system
- Memory: Give the new VM at least 256 MB of RAM.
- Virtual Hard Disk: Select "use an existing hard disk", navigate to the directory where you extraced the ZIP, and select the VMDK hard disk image.
Using the OVF...
- Unzip the OVF build
- In VirtualBox, click File on the menu bar and select Import Appliance, then navigate to the directory where you extracted the ZIP and select the OVF file.
- Wait for VirtualBox to finish importing the OVF.
Basic VM configuration
After you've created the new VM, you'll need to tweak its configuration:
-
Settings > System > Processor > Enable PAE/NX
- PAE: This is required as the linux-virtual kernel in the VM optimized images uses PAE to allow addressing of more than 4GB of memory.
-
NX: refers to the CPU feature required by VirtualBox to support PAE. All new CPUs support NX but some older ones may not.
- Troubleshooting: On old hardware if the VM refuses to boot, you may need to install from ISO instead.
-
Settings > Network > Adapter 1 > Attach to: bridged
Bridging your VM connects it to the local network your host machine is on. (There are other options that are explained here).
Now boot your virtual appliance for the first time.
Third, install the generic ISO image (#2 alternative)
Note: The following screenshots are for older versions of VirtualBox and TurnKey Linux. Some of the details have changed, though the essentials are the same.
Create a new Virtual Machine
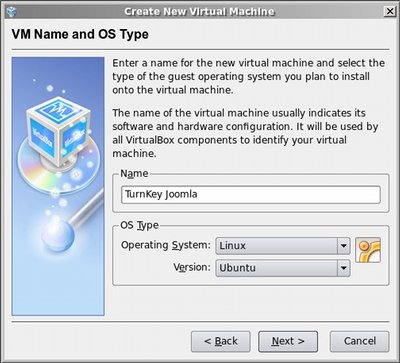
Start VirtualBox and click the New button from the menu. This starts a VM (Virtual Machine) creation wizard.
Give your new VM a name (e.g., TurnKey Joomla) and select Linux Ubuntu (Note: make sure you select the '64bit' variety if you are using an amd64 ISO) as your operating system.
Follow through the VM wizard to completion, allocating at least 256MB RAM for the VM and creating a new Virtual Disk for it with the Virtual Disk Wizard. Just accept the defaults and a few clicks on Next and you're done.
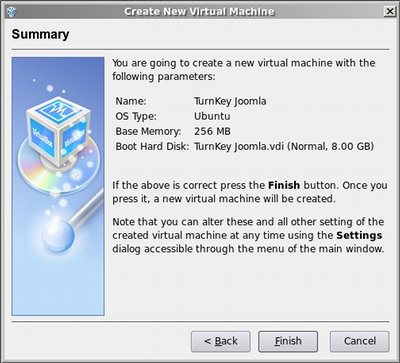
After exiting from the VM creation wizard, you'll see your new VM in the machine list on the main screen.
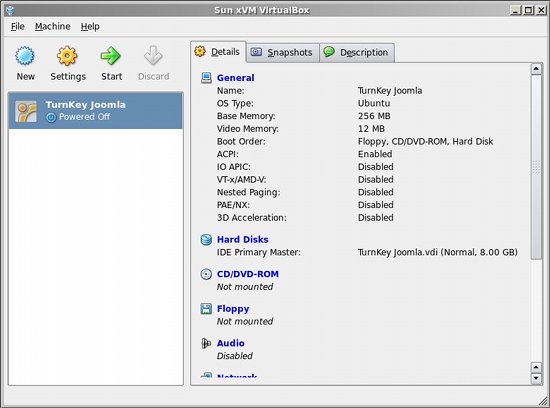
Configuring the Virtual Machine
Next you'll need to tweak a few configuration settings for the new VM (e.g., Network, CD image, Boot order). Click the Settings button to start.
Configure boot order
In the General section, click on the Advanced tab and change the boot order so that Hard Disk is before CD/DVD-ROM drive. This way after we install the appliance from the appliance CD image it will boot straight from the virtual Hard Disk.
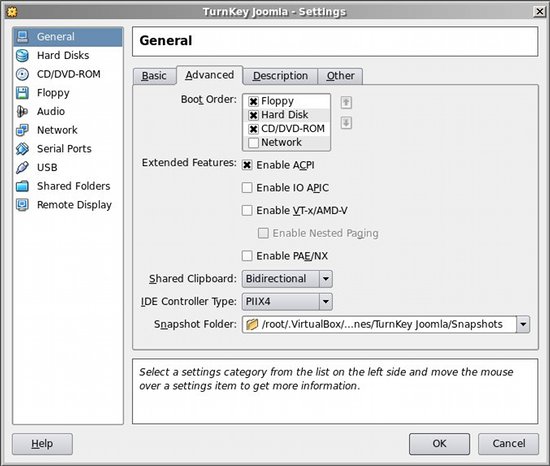
Note for users with AMD CPUs: if you have an AMD Phenom or Barcelona-level Opteron CPU you may need to enable IO APIC here to work around a Linux kernel bug.
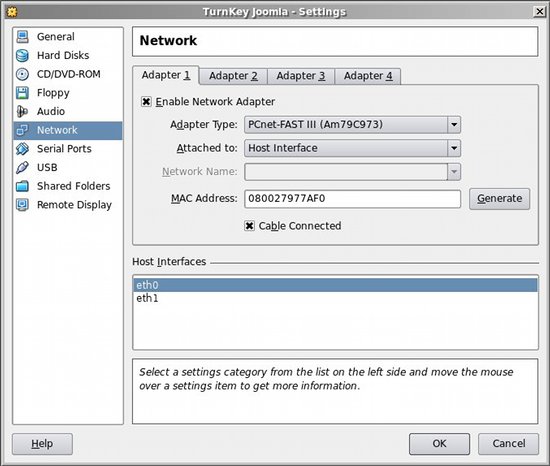
Configure network
In the Network section, attach your VM to a Bridged Adapter (in older VirtualBox versions this is called Host Interface). This bridges your VM to the local network your host machine is connected to. If you have multiple network interface cards on the host, select which of them you want your VM to attach to. If unsure, experiment. You can always change this later.
Configure CDROM boot media
TurnKey appliances are packaged as an installable Live CD image (a bootable ISO).
In the CD/DVD-ROM section, check Mount CD/DVD Drive and the select ISO Image File. Clicking on the right-side folder icon starts the Virtual Media Manager, which allows you to select the TurnKey Joomla ISO image you previously downloaded.

Installation
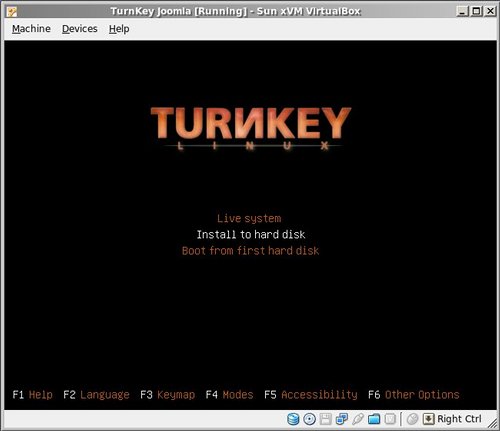
Back in the VirtualBox main menu, select the TurnKey Joomla Virtual Machine and click on the "Start" button.
Once the VM starts, you will see the boot loader menu. Select the "Install to hard disk" option with the keyboard and press Enter.
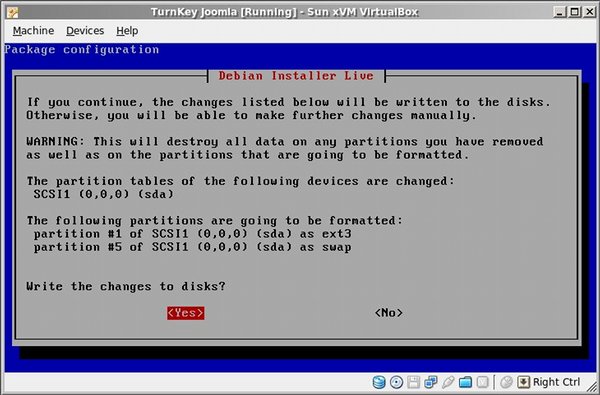
This boots TurnKey Joomla straight into the appliance's installer. Select the default "Guided" partitioning method, which figures out how to partition the virtual hard disk automatically. If unsure, just confirm the defaults.

Confirm the re-partitioning of the virtual hard disk.
The installer will now quickly install the appliance to the virtual hard disk. Usually this takes about a minute. When installation is complete, restart the appliance.
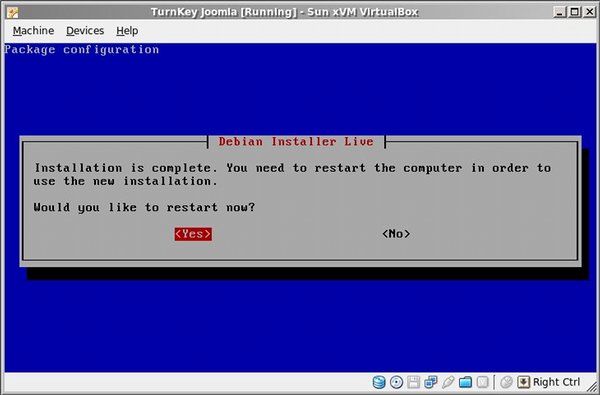
The system will now reboot from the virtual Hard Disk.
The first time the system boots, you'll be taken to various configuration screens (e.g., set passwords, install latest security updates). After that the first boot will finish and you'll reach the Configuration Console's Usage screen.
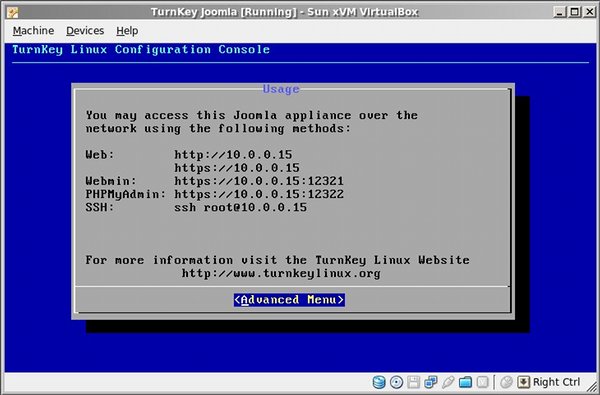
You can now use a browser to log into your newly installed TurnKey Joomla appliance. Enjoy!
Comments
Can VirtualBox and TurnKey run from a USB Flashdrive?
Hello! Newbie question.
Can VirtualBox and TurnKey be installed on a USB Flashdrive?
I've searched for the correct answer for a while now and I always find them contradictory.
Thank you!
Your could store the data (ie VM HDD, config etc) on USB
But I don't think the VirtualBox software itself. So the machine could be portable, but only on machines VirtualBox was installed on. Although I don't know for sure.
Best way to find out is spend a bit of time reading up and do some testing.
I Have Spent Plenty of Time Reading on the Subject....
...like I said, what I have come across, it contradicts each other that I do not know what to believe anymore.
I have downloaded the latest version to an 8GB.
This is what I have found on my desktop:
C:\Documents and Settings\My File\.VirtualBox
and in \.VirtualBox I have 2 Folders (along with Files VirtualBox.xml and VirtualBox.xml-prev):
Unfortunately, I do not have an extra PC lying around to test its portability.
Since I don't fully understand how virtual appliances work, do you know of any books for beginners and that are current?
Thank you for any responses.
Update: Just found a newer and up to date book on virtual appliances since my last search about a month ago . I don't know if it's beginner friendly though. Also like to read tech books that are published with in the last year.
My process...
My process goes something like this: reading, testing, reading, playing, breaking, reading, deleteing, starting again. Its probably not the most efficient method but it works for me and if you can get it to work then you know it works!
The VirtualBox forums are probably a good place to post with questions directly relevant to VirtualBox. But son't be scared to share your info here in the General forumif you think it'd be relevant to other TKL users - that's what community is all about. Also for your Linux questions there are a number of good forums but honestly I find Google probably the best tool for finding info about Linux.
The machines themselves are definately portable (ie the VM images) but I would have doubted that the VirtualBox software itself would be. That was until I did a Google search for "virtualbox portable". The first result say that yes indeed it is possible and includes a link to the second result which has downloads of Portable-VirtualBox!
Have fun!
Securing the VM's
I hope the team adds the ability to encrypt the whole disk via encrypted LVM installation.
Cheers!
Philippine Yii Framework Users Group
http://bit.ly/PhilYiiUsersGroup
Same as all the other appliances...
Via SFTP (port 22) using the address as stated on the confconsole screen; username 'root' and password set at first boot.
Yes SFTP is supplied by the openssh-server package
So it is actually an integral part of the ssh server. I assume that you've installed your own FTP server to TKL as AFAIK plain FTP isn't available OOTB (only SFTP on port 22).
I regualrly use SFTP (via FileZilla) from various Windows and Linux OSs, conecting to TKL appliances hosted in VirtualBox, VMware Server, Proxmox (local and remote) and in the cloud (AWS via the Hub) and haven't had any problems.
If it's not working for you then my first suspicion would be networking issues of some sort. You can rule out the TKL firewall unless of course you enabled it (it's disabled by default).
No short answer
But this thread may help:
http://www.turnkeylinux.org/forum/support/20100805/upgrade-bugzilla
This one is more general and may be relevant:
http://www.turnkeylinux.org/forum/general/20100405/packages-repositories...
Also this page in the Wiki may also be useful reading:
http://www.turnkeylinux.org/node/2667
And for future reference it's probably best to post a new topic in the forums rather than posting here.
I have no idea what you are talking about
But I guess it's not the LAMP appliance (that serves /var/www/index.[php|html] by default).
So rather than making a random post here, I suggest that you start a new thread in the 'support' section of the forums and give a little bit more detail of your situation. I can't guarantee that I can help, but I have no hope when I don't even know what appliance you are using...
Two (or more) sites on one virtualbox using Turnkeylinux?
Hi all,
I have a working test site on my VirtualBox (on a windows 64 bit pc) using this excellent Turnkey system.
How do I add another site to my virtualbox?
In a windows iis system I can rout the clients to mySiteOne.com and mySiteTwo.com by telling iis that the two sites are in different directories.
I've found Linux info on multi sites on one server but I cannot find information on multi sites using Turnkey and virtualbox on windows 7.
Help appreciated.
You need to set virtualhosts
Assuming that you are using the LAMP appliance, either you can use Webmin to adjust this, or personally I find manually adjusting sites files easier. They are in /etc/apache2/sites-available/
I'd copy the default site to get you started:
Make the doc roots:
You can then edit the new sites files, I suggest nano, like this:
Mostly you should just need to edit the name Apache listens for (e.g. change '*.80' to 'mySiteOne.com:80' and the doc root from /var/www to /var/www/mySiteOne.com
When you have done that, disable the default site and enable your 2 new ones like this:
and restart Apache
Also don't forget to adjust your hosts file (or add the sites to your DNS).
For further info you should google something like 'apache2 virtualhosts config debian'. Substituing ubuntu for debian should give you results worth reading too. FYI TKL is based on Debian Squeeze which is quite close to Ubuntu for the purposes of configuring Apache2 - If you try to follow instructions based on other Linux OS (like CentOS/RHEL/etc) or from Apache itself it won't be that useful as the config files are laid out differently.
You need to set virtualhosts
Thank you") ( I could not find a simple thank you button)
( I could not find a simple thank you button)
I will start work on that now.
It would help a lot if there was a explorer like tool for Linux. It is many years since I used command line stuff and that was MS stuff.
Try Filezilla
You can use Filezilla to connect via SFTP to your server and edit the files locally (on Windows). The other recommendation I would make is to make sure you don't use MS Notepad (it wrecks Linux files). I recommend you use Nopepad++ instead.
FileZilla (Solved)
Thanks for the FileZilla tip.
I now have access to my working test site.
However I cannot find my wordpress files :(
I can see the root,etc (apache2 is there) and usr.
I have found /etc/apache2/sites-enabled and in there is wordpress but I cannot open it.
Found it :- /var/www/wordpress
System...
Virtualbox turnkey linux (debian) 12.1 squeeze amd64 vmdk
Standard wordpress (no changes except for Theme)
Cannot connect to PHPMyAdmin 12322
Hi,
I cannot connect with firefox or chrome using http://my IP for Debain wordPress box:12322
All the others work 12320, 12321 (not tried SFTP port 22 yet)
Your browser sent a request that this server could not understand.
Reason: You're speaking plain HTTP to an SSL-enabled server port.
Instead use the HTTPS scheme to access this URL, please.
System...
Virtualbox turnkey linux (debian) 12.1 squeeze amd64 vmdk
FTP,HTTP, HTTPS,SMTP and Port 53 are setup in the router to forward to the Virtualbox although I the client and the server are on the same local network for this test.
VBox 4.2/VMDK?
A bit of thread archaeology here...
I've just downloaded the latest TKL VMDK for Redmine, and I'm trying to run it in Virtual Box 4.2. I unpacked the VMDK, and attached it to a new VM, with 1G of RAM and PAE enabled. It boots grub, and then autoboots to a 3.2.0-4-amd64 kernel (even though my laptop is a Celeron), tells me it's trying to load the initrd, and then hangs there forever.
Is there something else obvious that perhaps I'm missing in the VM creation? The Vbox install is tested and runs Win7 ok on this machine. There's a 4.3 release out, and I'll go get that, but I don't expect that will actually fix this category of problem...